Using formly for creating dynamic form in Angular
1. Introduction
The web form is necessary for a website. And there are 2 types of forms in Angular
Reactive forms : Provide direct, explicit access to the underlying form’s object model. Compared to template-driven forms, they are more robust: they’re more scalable, reusable, and testable. If forms are a key part of your application, or you’re already using reactive patterns for building your application, use reactive forms.
Template-driven forms : Rely on directives in the template to create and manipulate the underlying object model. They are useful for adding a simple form to an app, such as an email list signup form. They’re straightforward to add to an app, but they don’t scale as well as reactive forms. If you have very basic form requirements and logic that can be managed solely in the template, template-driven forms could be a good fit.
And today, I will show you a 3 party form existence that can help you to create a nice dynamic form, it’s Formly and built on top of Reactive Forms.
Formly is a powerful extension for generating forms, you can dynamic to pass the data for creating a web form and don’t need to write the HTML in frontend. For example, you can get the JSON from API and create the form, all of the settings can be done in a JSON format! And there is a bunch of themes you can use!
Ok, let’s start it!
2. Base Form Layout
2.1. Install Formly
There are 7 themes that support for Formly,
bootstrap
material
ng-zorro-antd
ionic
primeng
kendo
nativescript
you can install with one of the themes as below command, and I just want to use material 🙂
npm install @angular/forms @ngx-formly/core @ngx-formly/material --save
2.2. Create the base form layout component
Create the form layout component without a test file
ng g c FormLayoutTesting --skip-tests
add the below module in app.moudle.ts
@NgModule({

    imports: [
        ReactiveFormsModule,
        FormlyModule,
        FormlyMaterialModule
    ]
})
set the fields with FormlyFieldConfig, this is a JSON format to config the fields data, and use the model for setting the default value
//form-layout-testing.component.ts

  form = new FormGroup({});
  model = { email: 'email@gmail.com' };

  public fields: FormlyFieldConfig[] = [
    {
      key: 'name',
      type: 'input',
      props: {
        label: 'User Name',
        placeholder: 'Enter user name',
        required: true,
      }
    },
    {
      key: 'email',
      type: 'input',
      props: {
        label: 'Email address',
        placeholder: 'Enter email',
        required: true,
      }
    }
  ];
put the formly-form inside the form tag in HTML code
<!-- form-layout-testing.component.html -->
<form [formGroup]="form">
  <formly-form [form]="form" [fields]="fields" [model]="model"></formly-form>
  <div mat-dialog-actions>
  <button mat-raised-button color="primary">Submit</button>
</div>
</form>
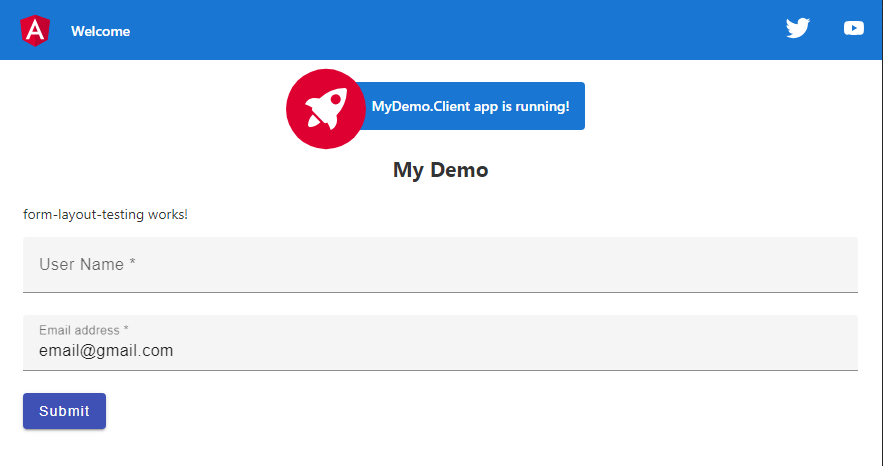
then you will see the below screen after running the project
3. Advance usages
The formly is very powerful, I will show you how it’s working 🙂
3.1. Validations
We can easy to check the email format with regular express in the form with pattern , and set the error message
{
  key: 'email',
  type: 'input',
  props: {
    label: 'Email address',
    placeholder: 'Enter email',
    pattern: /^[a-z0-9._%+-]+@[a-z0-9.-]+\.[a-z]{2,4}/,
    required: true,
  },
  validation: {
    messages: {
      pattern: (error: any, field: FormlyFieldConfig) => `"{field?.formControl?.value}" is not a valid email Address`,
    },
  },
}
you can also create a custom validation function. For example, I want to check and make sure the website name must be coder blog, then create a custom validator function up on @Comonent
export function webSiteNameValidator(control: AbstractControl): ValidationErrors {
  if (control.value) {
    var name = control.value; //get the input value for checking
    console.log(control.value);
    if (name != null && name != "coder blog") {
      return { error: { message: 'The website name must be "coder blog"!' } };
    }
  }
  return {};
}

@Component({
  selector: 'app-form-layout-testing',
  templateUrl: './form-layout-testing.component.html',
  styleUrls: ['./form-layout-testing.component.scss']
})
set the validation method
{
  key: 'website_name',
  type: 'input',
  props: {
    label: 'Website Name',
    placeholder: 'Enter website name',
    required: true,
  },
  validators: {
    validation: [webSiteNameValidator]
  }
},
and then must be input code blog in the frontend, otherwise it would not valid :smirk:

4. Preset Fields
This is also a great function that lets you preset the common fields so that you don’t need to input the same settings in each component. For example, the Is Active should be applied for each table, so we can set it to a preset field:
a) Importing the FormlyPresetModule into app.module.ts
import { FormlyPresetModule } from '@ngx-formly/core/preset';

...

@NgModule({
    imports: [
        FormlyPresetModule
    ]
})
b) Set the presets property
@NgModule({
    imports: [
        FormlyPresetModule,
        FormlyModule.forRoot({
        presets: [
            {
            name:'isActive',
            config: {
                key: 'isActive',
                type: 'checkbox',
                templateOptions: {
                label: 'Is Active',
                },
            }
            }
        ],
        })
    ]
})
c) Using it in component
 public fields: FormlyFieldConfig[] = [
    { type: '#isActive'},
    ...
 ];
and you will find it in the form

5. Field Wrappers
As you can see in the above case, the checkbox field has been put in an input field style, this is very strange, we can fix it by changing the field wrapper to formly-wrapper-div (default is formly-wrapper-mat-form-field )
a) Create a wrapper component (put all of the formly-related codes into formly folder)
//app/formly/wrappers.ts

import { Component } from '@angular/core';
import { FieldWrapper } from '@ngx-formly/core';

/**
 * This is just an example of wrapping field into a div
 */
@Component({
  selector: 'formly-wrapper-div',
  template: `
    <div>
      <ng-container #fieldComponent></ng-container>
    </div>
  `,
})
export class FormlyWrapperDivComponent extends FieldWrapper {}
as you can see, we set the selector to formly-wrapper-div and put the field container into a div
b) Add the wrappers in formly config and set the wrapper to the field, below is the preset field
FormlyModule.forRoot({
      presets: [
        {
          name:'isActive',
          config: {
            key: 'isActive',
            type: 'checkbox',
            templateOptions: {
              label: 'Is Active',
            },
            wrappers: ['div']
          }
        },
      ],
      wrappers: [
        {
          name: 'div',
          component: FormlyWrapperDivComponent,
        },
      ],
    })
c) After that, we can take a look at the result, it’s better now 🙂

6. Custom Field
The other powerful feature is that you can create custom fields. For example, we will create an upload file field:
a) Create the custom field component by the below command (you need to create the app/formly/custom-fields folder first)
ng g c formly/custom-fields/formly-field-file --skip-tests
b) extends the component from FieldType<FieldTypeConfig>
//formly/custom-fields/formly-field-file.component.ts

import { Component } from '@angular/core';
import { FieldTypeConfig } from '@ngx-formly/core';
import { FieldType } from '@ngx-formly/material';

@Component({
  selector: 'app-formly-field-file',
  templateUrl: './formly-field-file.component.html',
  styleUrls: ['./formly-field-file.component.scss']
})
export class FormlyFieldFileComponent extends FieldType<FieldTypeConfig> {}
c) add the below html into formly-field-file.component.html, this is the file type html template
<input type="file" accept=".pdf,.zip,.jpg,.png" [formControl]="formControl" [formlyAttributes]="field">
d) create a custom form control directive for handling the on-change event, so that can trigger the validate functions, implement ControlValueAccessor
import { Directive } from '@angular/core';
import { NG_VALUE_ACCESSOR, ControlValueAccessor } from '@angular/forms';

@Directive({
  // eslint-disable-next-line
  selector: 'input[type=file]',
  host: {
    '(change)': 'onChange($event.target.files)',
    '(blur)': 'onTouched()',
  },
  providers: [
    { provide: NG_VALUE_ACCESSOR, useExisting: FileValueAccessor, multi: true },
  ],
})

export class FileValueAccessor implements ControlValueAccessor {
  value: any;
  onChange = (_: any) => {};
  onTouched = () => {};

  writeValue(_value: any) {}
  registerOnChange(fn: any) {
    this.onChange = fn;
  }
  registerOnTouched(fn: any) {
    this.onTouched = fn;
  }
}
e) add the field types into app.module
FormlyModule.forRoot({
      ...
      types: [
        {
          name: 'file',
          component: FormlyFieldFileComponent,
          wrappers: ['form-field']
        }
      ],
    })
f) create the custom validation to make sure support the correct files
export function uploadFileValidator(control: AbstractControl): ValidationErrors {
  if (control.value) {
    var fileName = control.value[0].name;
    console.log(fileName);
    var fileExt = fileName.substring(fileName.lastIndexOf('.') + 1, fileName.length).trim() || fileName;
    if (fileExt.toUpperCase() != "PDF" && fileExt.toUpperCase() != "ZIP" &&
    fileExt.toUpperCase() != "JPG" && fileExt.toUpperCase() != "PNG") {
      return { attachment: { message: 'Only support .pdf,.zip,.jpg,.png file!' } };
    }
  }
  return {};
}
apply to the field
{
  key: 'attachment',
  type: 'file',
  templateOptions: {
    required: true,
  },
  validators: {
    validation: [uploadFileValidator]
  },
},
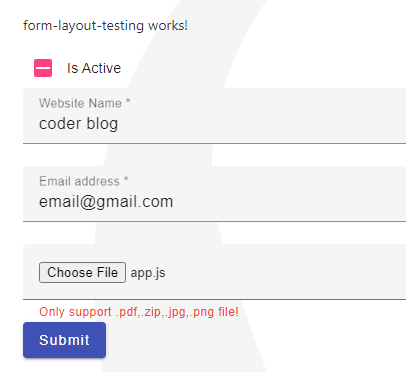
Ok, let’s take a look at the result

click the file field, will popup a choose file dialog box, because we already set the input accept=".pdf,.zip,.jpg,.png", so just can see these files in the dialog box

if we choose another file then will be an error
7. Summarize
The form is very important in a website, if you need to use many forms on your site, you should use a better form package or framework to improve your work, so we learned how to use Formly in this post, but this is only a few parts of it, you can go to the official website for more details.
If you have any problems, welcome to discuss them with me :smiley:
![]()
The post Using formly for creating dynamic form in Angular first appeared on Coder Blog.