私有镜像仓库 Harbor 的安装与配置
饮冰先生 (237572656@qq.com)发表于 2020-03-18 00:00:00
在云原生时代,各种系统服务都以 Docker 容器的方式运行着。镜像仓库,顾名思义就是用来存放 Docker 镜像的地方,它是云原生架构的核心之一。目前,最为流行的私有镜像仓库便是 CNCF 的毕业生之一的 Harbor(中文含义:港口)。
本文将主要介绍如何在 CentOS 7 上安装和配置 Harbor。
安装 Docker 和 Docker Compose
配置阿里的 yum 源,并安装 Docker CE 版本。注:当前最新版本为 19.03.6:
$ yum install -y yum-utils device-mapper-persistent-data lvm2
$ yum-config-manager --add-repo http://mirrors.aliyun.com/docker-ce/linux/centos/docker-ce.repo
$ yum install -y docker-ce docker-ce-cli
创建 Docker 守护进程的配置文件,包括使用阿里镜像仓库提高下载速度,并重启 Docker:
$ mkdir /etc/docker
$ cat << EOF > /etc/docker/daemon.json
{
  "exec-opts": ["native.cgroupdriver=systemd"],
  "log-driver": "json-file",
  "log-opts": {
    "max-size": "100m"
  },
  "registry-mirrors": ["https://umqjaxg5.mirror.aliyuncs.com"],
  "storage-driver": "overlay2",
  "storage-opts": [
    "overlay2.override_kernel_check=true"
  ]
}
EOF
$ systemctl daemon-reload
$ systemctl start docker
继续安装 docker-compse 命令:
$ curl -L "https://github.com/docker/compose/releases/download/1.25.4/docker-compose-$(uname -s)-$(uname -m)" -o /usr/local/bin/docker-compose
$ chmod +x /usr/local/bin/docker-compose
安装 Harbor
下载 Habor 离线安装包并解压:
$ wget https://github.com/goharbor/harbor/releases/download/v1.10.1/harbor-offline-installer-v1.10.1.tgz
$ tar -xvf harbor-offline-installer-v1.10.1.tgz -C /opt/
打开 /opt/harbor/harbor.yml 文件,修改 hostname 域名、https 证书等配置信息,具体如下:
# Configuration file of Harbor
# The IP address or hostname to access admin UI and registry service.
# DO NOT use localhost or 127.0.0.1, because Harbor needs to be accessed by external clients.
hostname: registry.k8sadm.xinhua.tech
# http related config
http:
  # port for http, default is 80. If https enabled, this port will redirect to https port
  port: 80
# https related config
https:
  # https port for harbor, default is 443
  port: 443
  # The path of cert and key files for nginx
  certificate: /opt/certs/registry.k8sadm.xinhua.tech.cert
  private_key: /opt/certs/registry.k8sadm.xinhua.tech.key
接着执行如下命令进行安装:
$ ./install.sh --with-clair
以上安装命令同时安装了 Clair 服务,一个用户镜像漏洞静态分析的工具。如果不需要,可以省略该选项。
安装成功后,可以通过 docker login 命令来测试仓库的连通性,看到如下字样即表示安装成功(也可以通过浏览器访问 Web UI):
$ docker login registry.k8sadm.xinhua.tech
Username: admin
Password: Passw0rd

Login Succeeded
至此,私有镜像仓库 Harbor 安装完毕。
试一试 Harbor
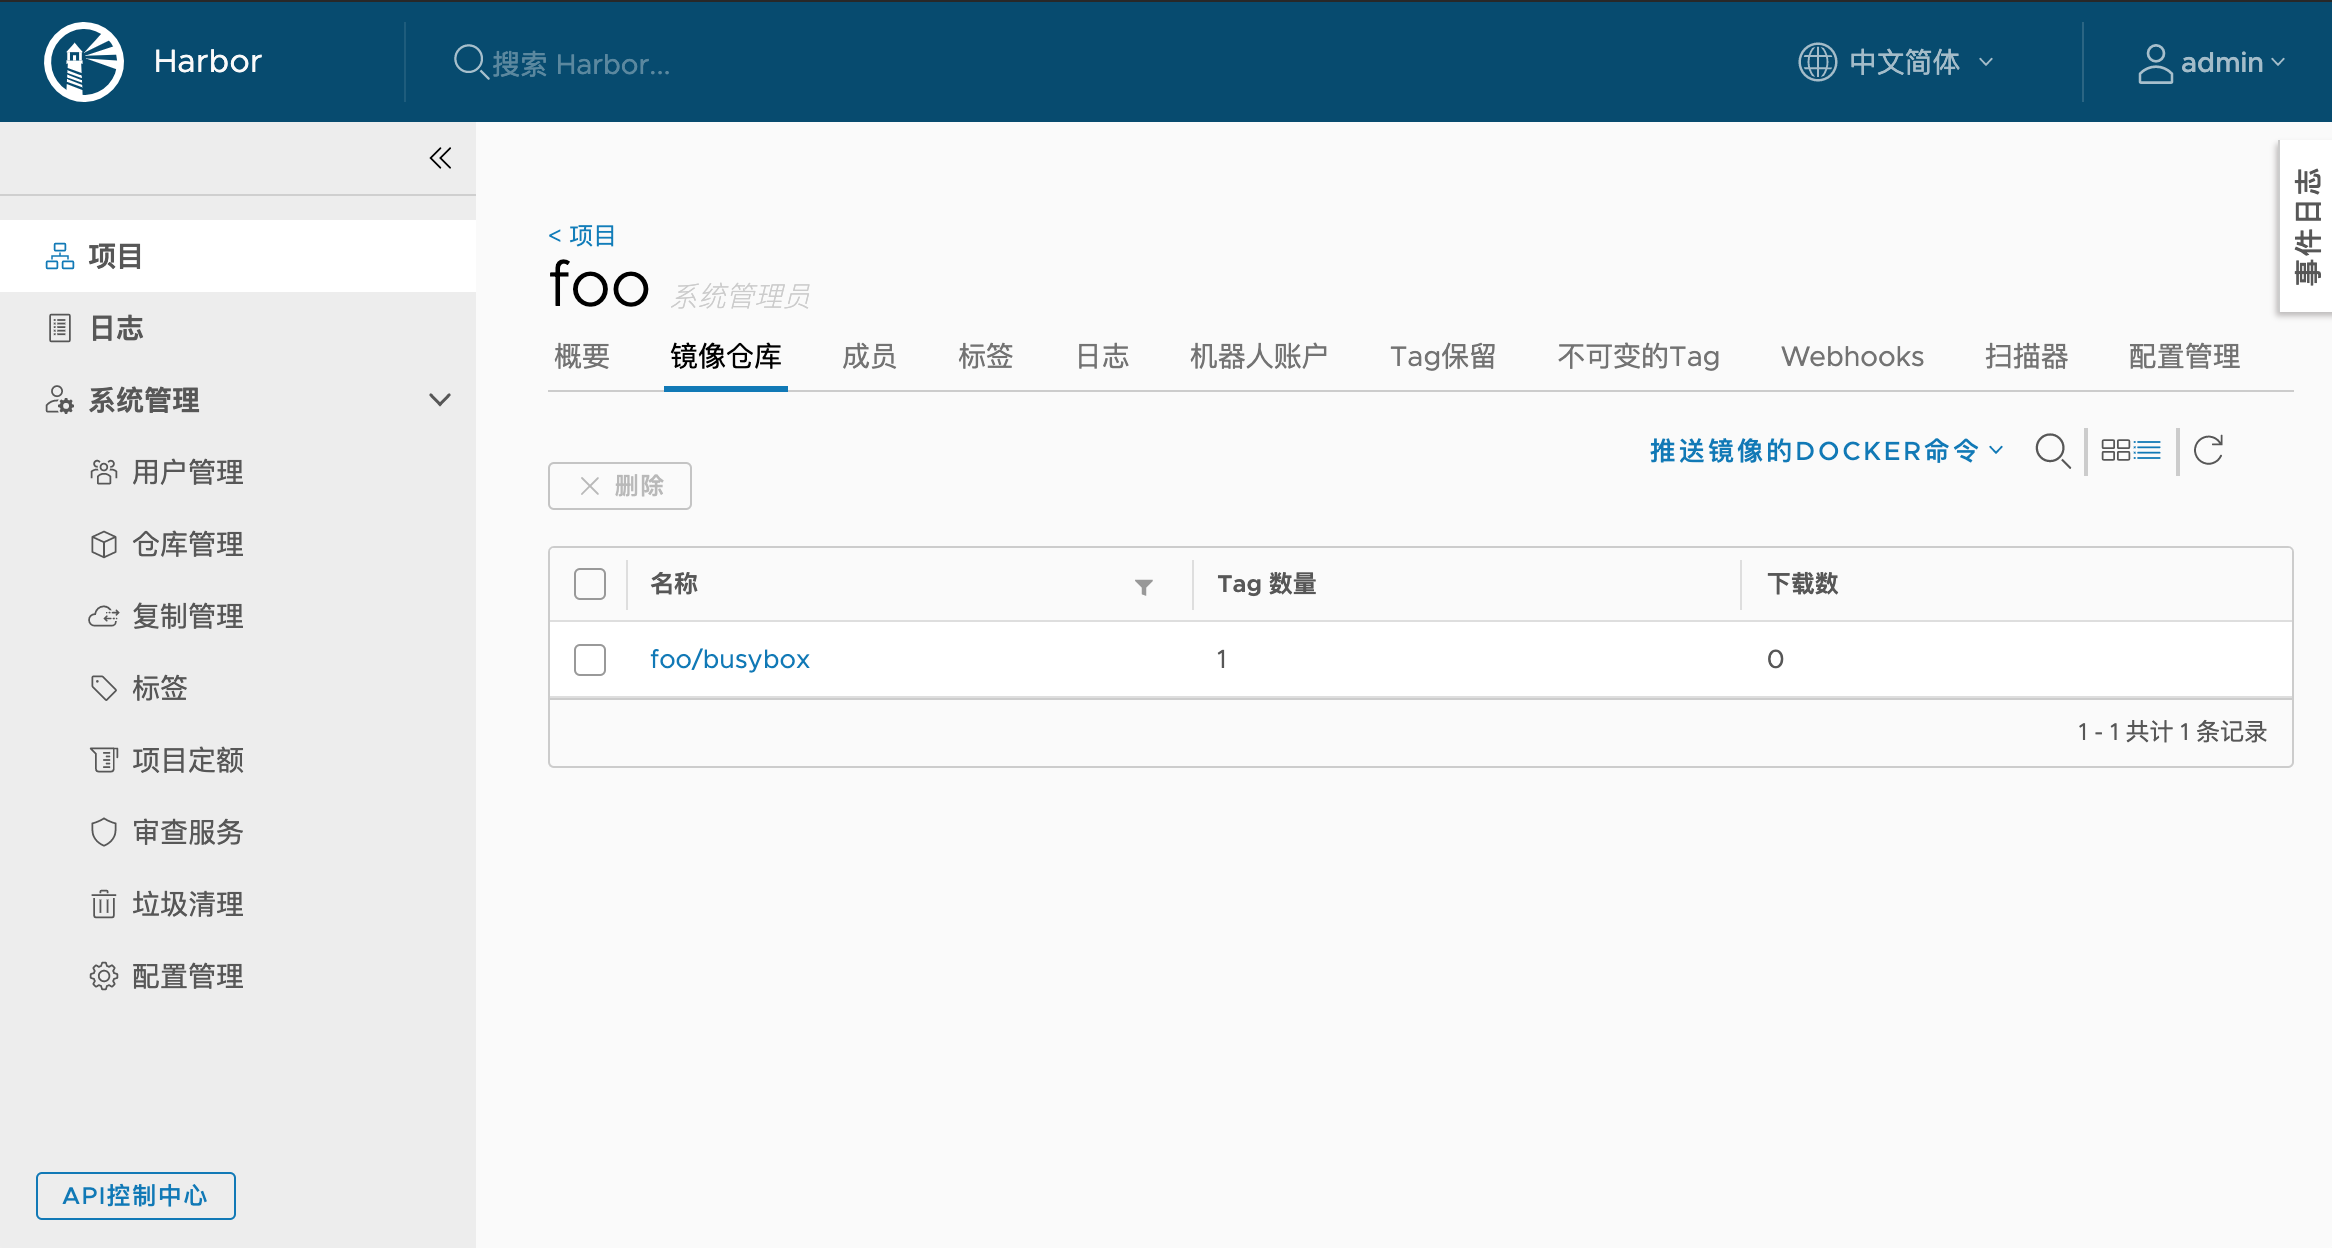
在 Harbor 中,镜像均以项目的形式组织。我们在页面上创建一个名为 foo 的测试项目,然后将从 Docker Hub 上拉取的 busybox 镜像推送到自己的仓库中:
$ docker pull busybox:1.31.1
$ docker tag busybox:1.31.1 registry.admtest.xinhua.tech/foo/busybox:1.31.1
$ docker push registry.admtest.xinhua.tech/foo/busybox:1.31.1
最后,可以在项目页面查看到刚刚上传的 busybox 镜像:

其他
如果需要重启 Harbor 服务,需要进入其安装目录,执行如下命令:
$ cd /opt/harbor
$ docker-compse down -v
$ docker-compse up -d